How to Contouring & Highlighting For Beginners
Beauty trends have been gaining in popularity, such as contouring. It involves applying darker matte (contour) and lighter shimmer (highlight) makeup to certain specific areas of your face. Contouring can make certain areas of your face look slimmer and more defined. Highlighting helps accentuate the existing glow of your face where the sun naturally hits it and make it seem as though it is illuminated from within.
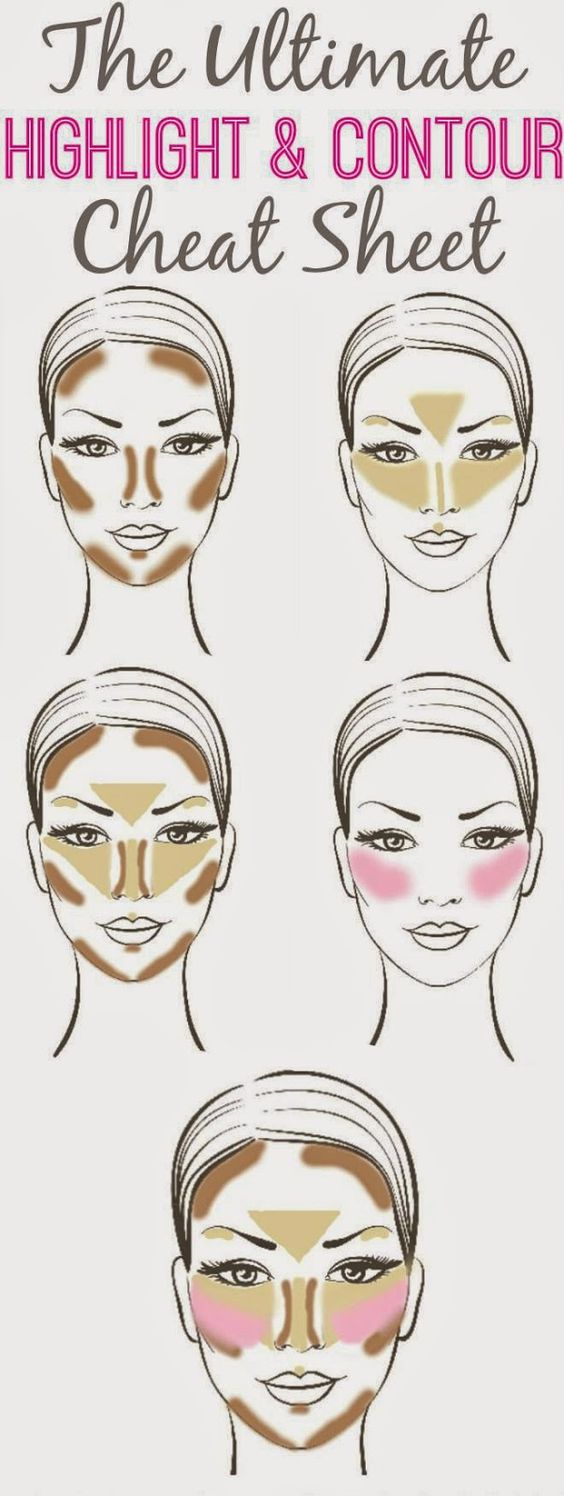
The Highlight and contour cheat sheet
Contouring is a great way to change the way you feel and look. Makeup routine to use daily. Beginners can be overwhelmed by the task of contouring and highlighting. Lucky for you, contouring and highlighting doesn’t have to be as difficult as it might seem. If you’re a beginner in the realm of contouring and highlighting, keep reading to learn how to Contour and Highlight like a pro in no time.
1. Stay on the Lines
You can’t blend contour and highlighter all over your face. They are very specific areas of your face where contour and highlighter must be put and where they need to stay in order to prevent a muddled and discolored appearance.
The contour is usually several shades darker than your skin tone. Be careful when applying makeup that dark. Highlighter is no different. When used correctly, highlighter can give your skin a luminous glow. Highlighter that is applied incorrectly will make you look greasy. You should only contour and highlight in the correct spots.
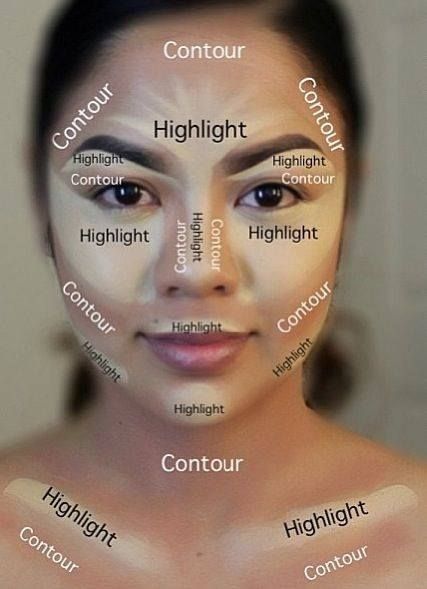
The temples, top of forehead, jawline, bottom of chin, cheekbones, sides of nose and cheekbones can all be contoured. Highlighter should be applied to the bridge and temples of the nose as well as the cheekbones and temples above the cupid’s arrow. Also, highlight the inner corners of the eye and the inner corners of the inner corner. You can apply the correct makeup by knowing where to contour and highlight.
2. Seal It In
One of the worst things about contouring and highlighting is how quickly the makeup can fade after it is applied. You can spend an extensive amount of time at your makeup table in the morning making your contour and highlighter look just right, only to realize that it has worn off when you glance in the mirror a few hours later.
The contour of your face tends melt and move around during the day. You may look strange. The shimmer of highlighter can wear off quickly and rub away throughout the day. Set your makeup after contouring, and highlighter to minimize these problems.
After you’ve finished contouring and highlighting, dust a translucent setting powder over your makeup. Use a kabuki with a gentle touch to apply setting powder. If you’re in the market for a translucent setting powder, a great one is the Urban Decay De-Slick Mattifying Powder .
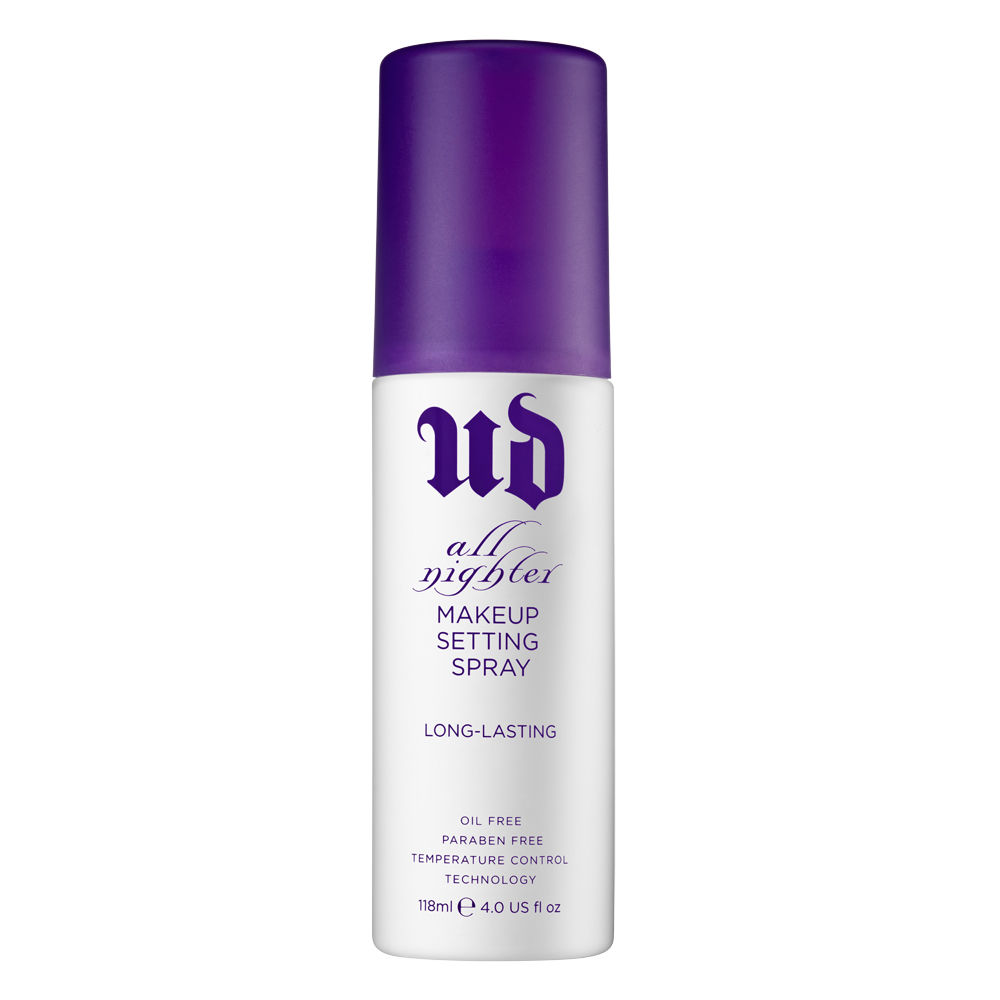
Spray a setting spray on your face to fix your makeup. It is best to spray it in a T and X pattern on the face. An excellent long-lasting setting spray is the Urban Decay All Nighter Long-Lasting Makeup Setting Spray .
Contour and highlighter should always be the last skin makeup you apply, after your foundation, concealer, loose powder, bronzer, and blush. Setting sprays and powders should be used only after contouring and highlighting. This will prevent the contours from becoming dulled.
3. Invest in the Right Makeup
It’s important to invest in the right contour and highlighter products to ensure that you end up with the look you want. You need to make sure that you get highlighter and contour that complements your natural skin tone. Choose between powder or liquid contours, highlights and contours.
Liquid contour and highlighter products create a more dramatic look and are more effective for beauty lovers who are hoping to dramatically slim or alter the shape of their features. Powder contour and highlighter products are easier to apply and less likely to mess up. They are therefore better for beginners. Anastasia Beverly Hills produces a variety of high-quality cream and powder highlighter and contour sets.
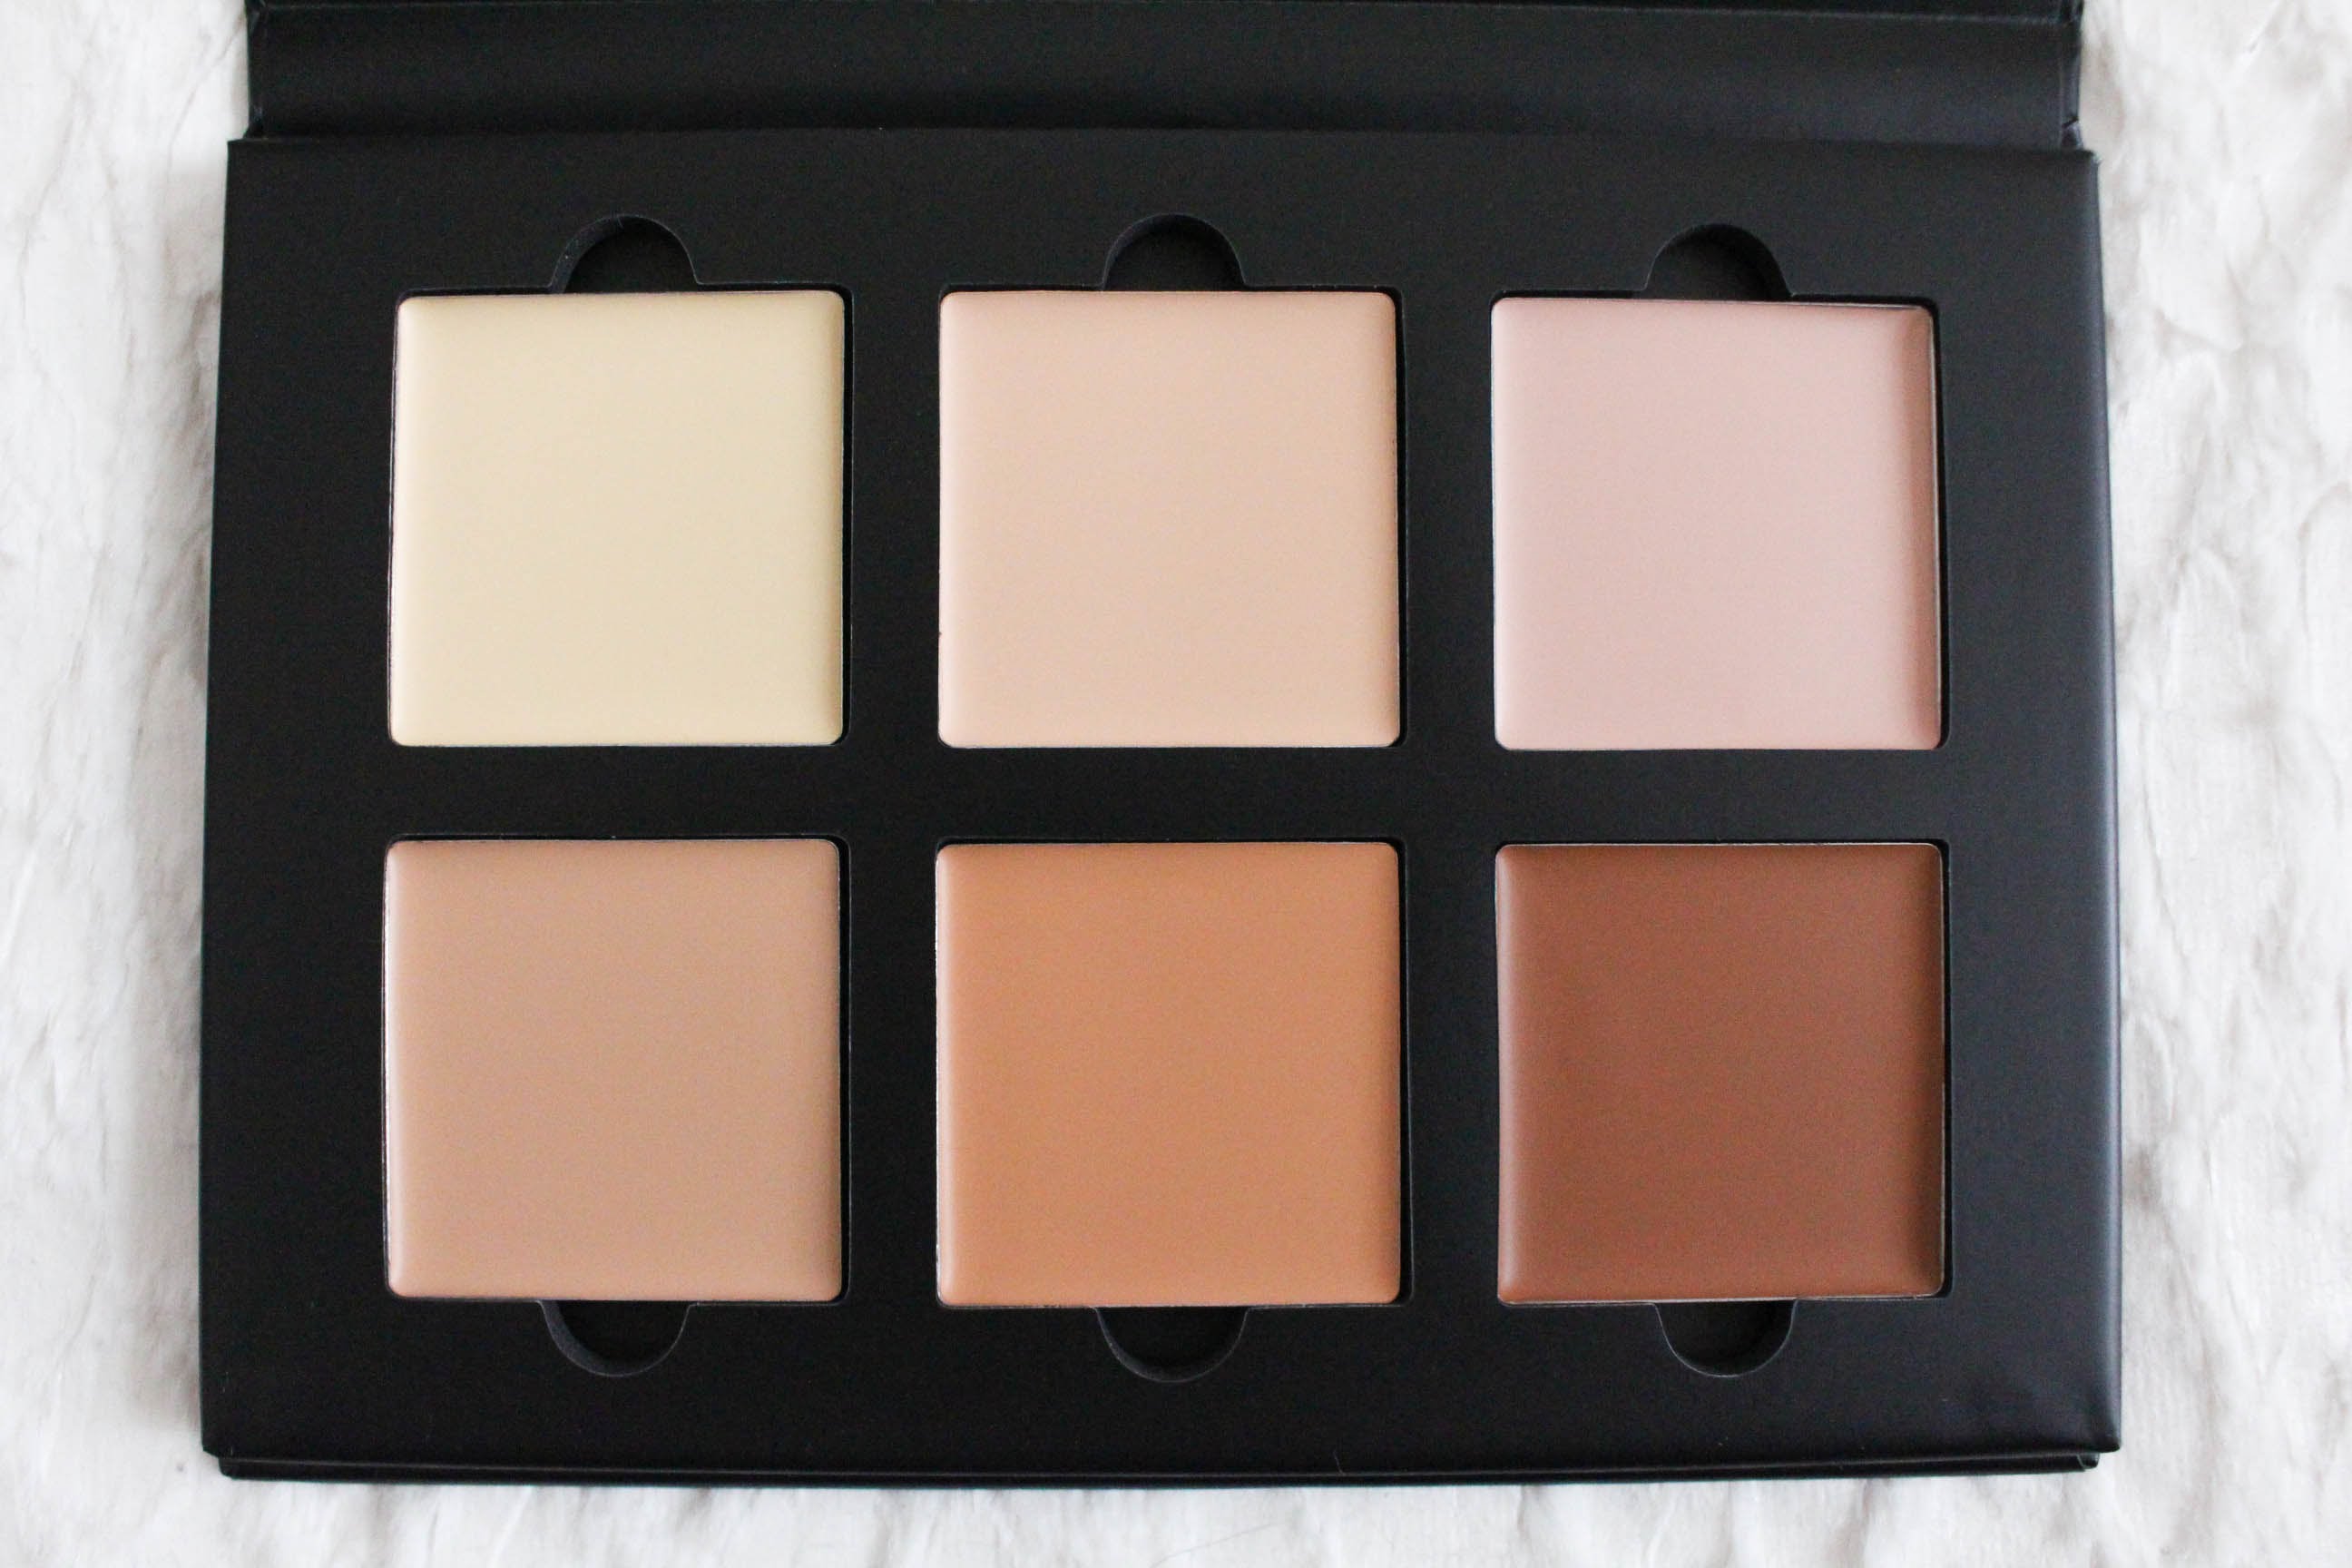
The Anastasia Beverly Hills Contour Cream Kit contains four different shades designed to match various skin tones. The kit itself comes with three separate shades of highlighter and three separate contour shades; this variety of shades can help beginners experiment with which colors look most complementary for their skin tone.
The Anastasia Beverly Hills Contour Kit is a palette of powder contour and highlighter products that includes three highlighter shades and three contour shades. The powder contour kit includes three options for different skin tones and the highlighter shades are more shimmery than the matte shades in the cream contour kit. Both kits are great for those who have never contoured or used highlighter. Your personal preferences will determine the choice you make.
4. Make Sharp Lines
Sharp lines are essential for contouring and highlighting. You may end up with a splotchy, oily face if you don’t use highlighter and contour in clean, crisp lines. Applying contour and highlighter in sharp lines can help your contour be more effective at slimming and defining your features and help your highlighter create a more intense illuminated glow.
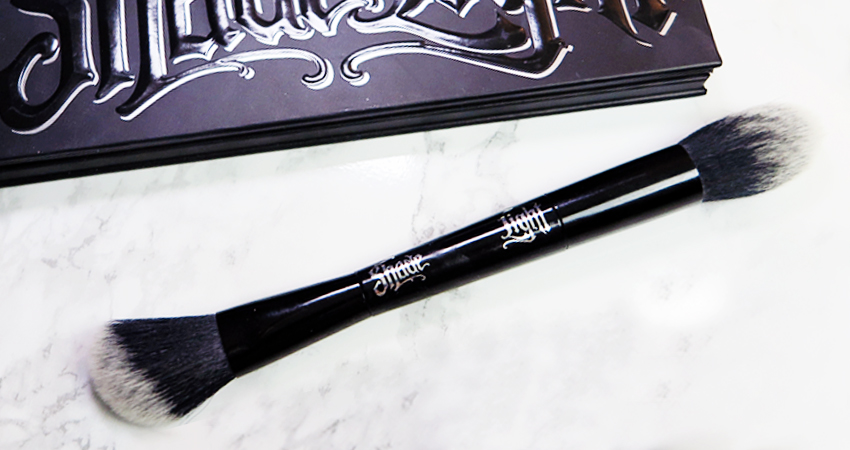
In order to ensure that you apply your contour and highlighter in sharp lines, use a sturdy sturdy angled contour brush for applying contour and a more rounded brush for sweeping on highlighter. An excellent dual-ended brush that works for both contouring and highlighting is the Kat Von D Shade + Light Contour Brush .
It is also helpful to rest your elbow on your table or any other flat surface in front of your mirror while applying your contour and highlighter. This allows you to create more straight, sharp lines.
5. Blending is the best friend
Although sharp lines are an important part of applying contour and highlighter that looks good and helps shape, slim, and illuminate your features, sufficient blending is an equally significant element of contouring and highlighting. If you don’t blend enough, your contours and highlights will look unnatural and too harsh. Contour especially creates a discolored, blotchy look if it is not blended sufficiently since it is so dark compared to the rest of your Face make-up.
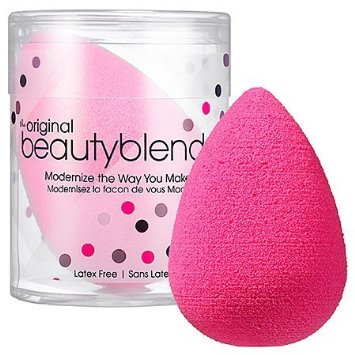
Use the flat, wide side of a makeup brush to blend contours into your makeup. Original Beautyblender can be used for both contouring and highlighting. Blend in the same way you contoured. Avoid swirling to avoid messing up sharp contour lines.
Blend highlighter by swirling the pointy end of a makeup sponge in small circles. You can also blend highlighter using your fingers by blending outward the edges of the product with your finger tips.
Highlights and contour
Contouring and highlights can be intimidating for beginners. Some may not even know where to begin. However, it really does not have to be any more difficult than any other element of the rest of your regular makeup routine. Just make sure that you follow the tips in this post to ensure that you are applying the right makeup in the right way to the right places and blending it sufficiently. Use these tips to blend makeup effectively. Contour and Highlight like a pro to create a gorgeous natural glow and a miraculous slimming and shaping effect. Check out the 10 Best Contour Products You Can Try here!
If you found this post is useful, why not bookmark it and sharing with your friends? Subscribe to PrettyDesigns for more beauty tips.
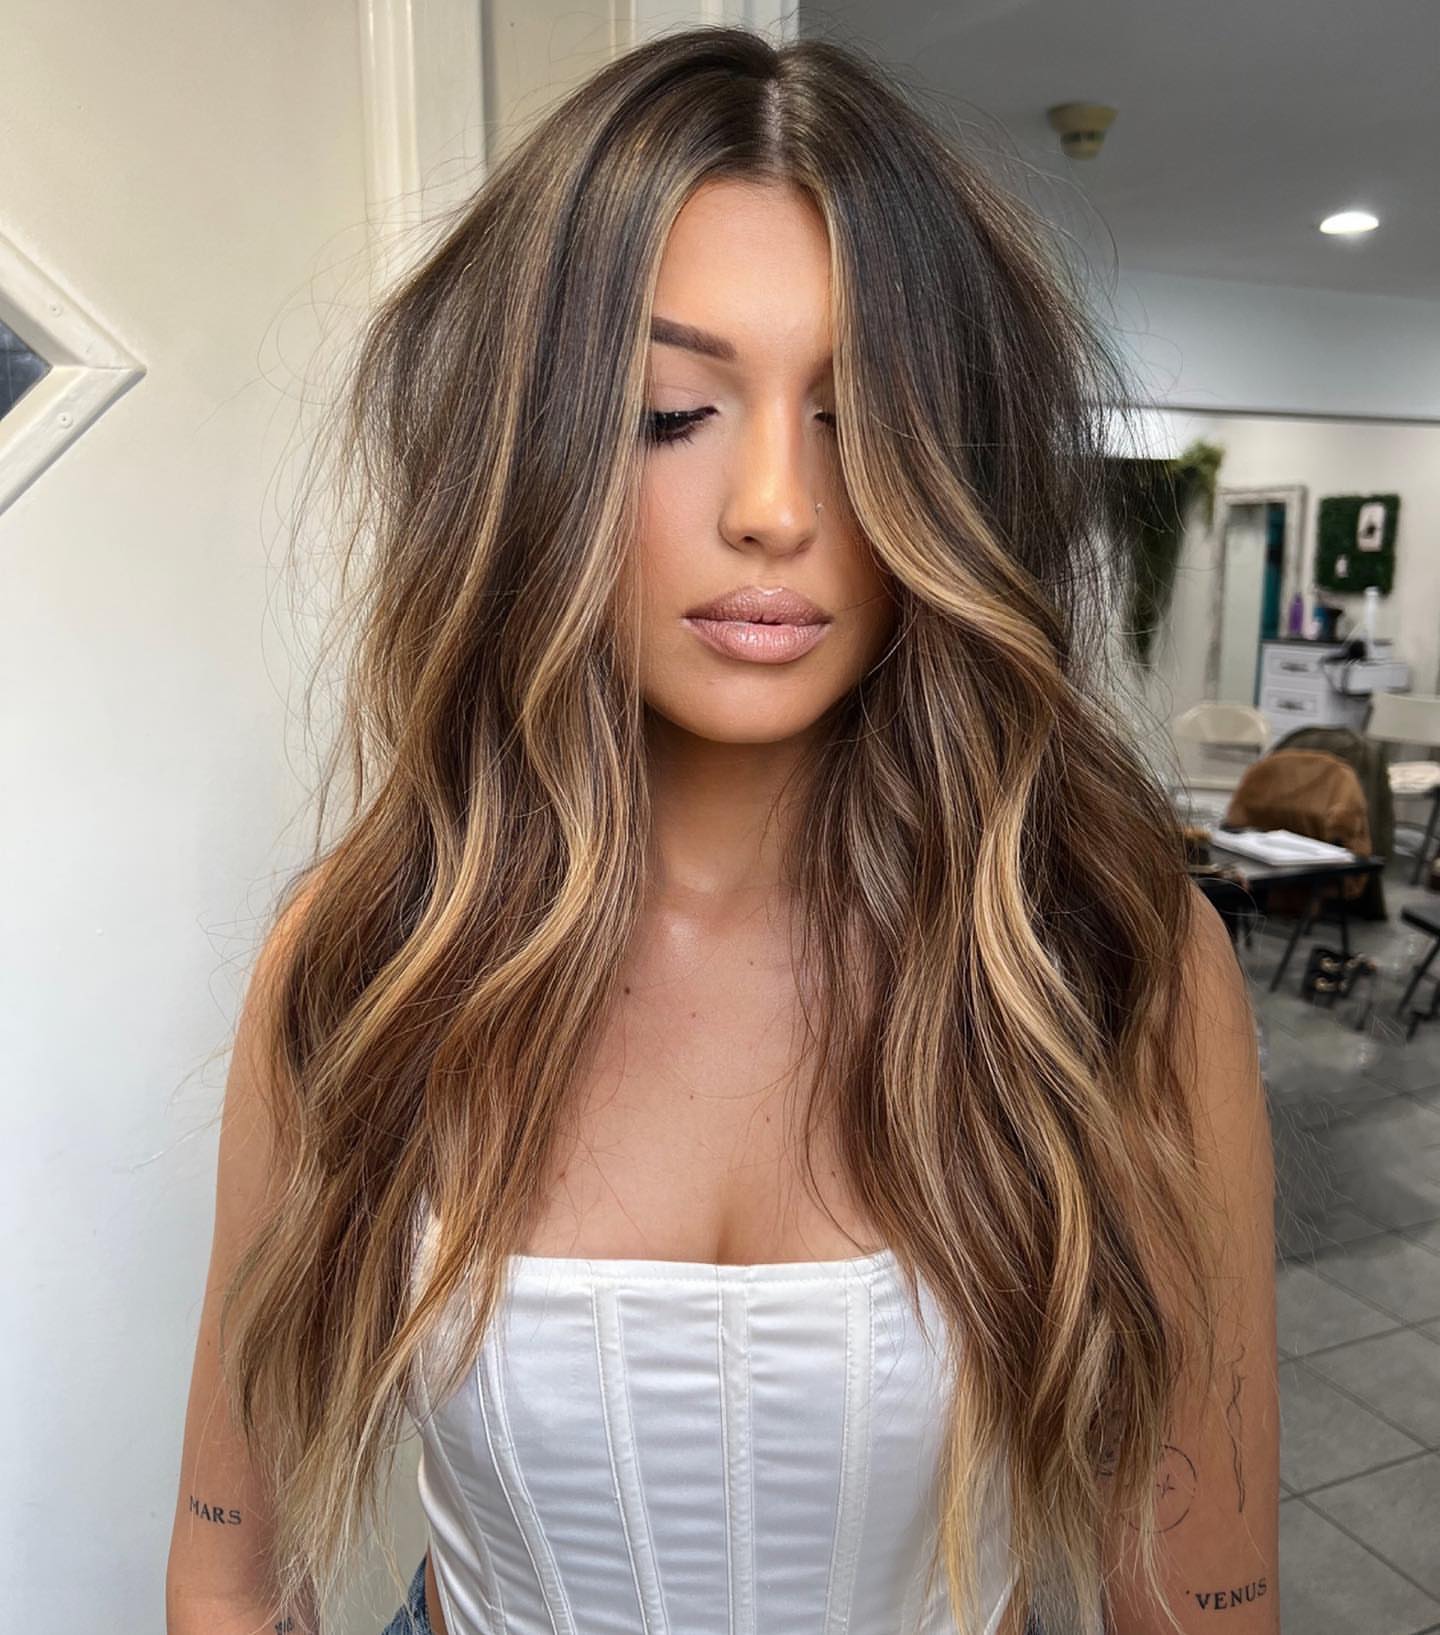
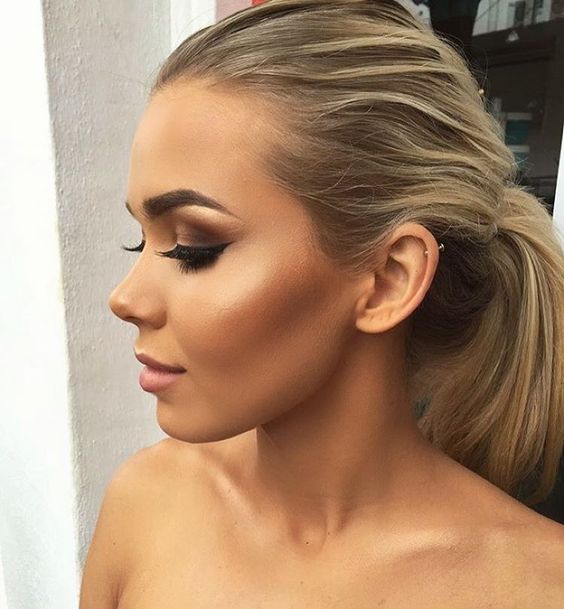
 Contour – makeup idea /pinterest
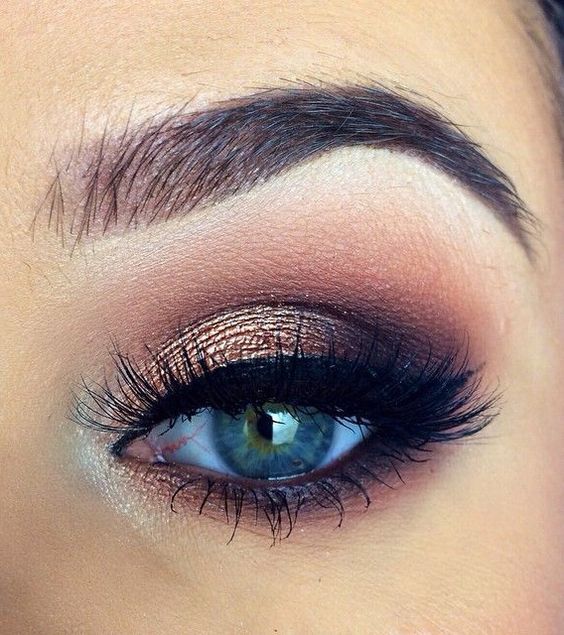
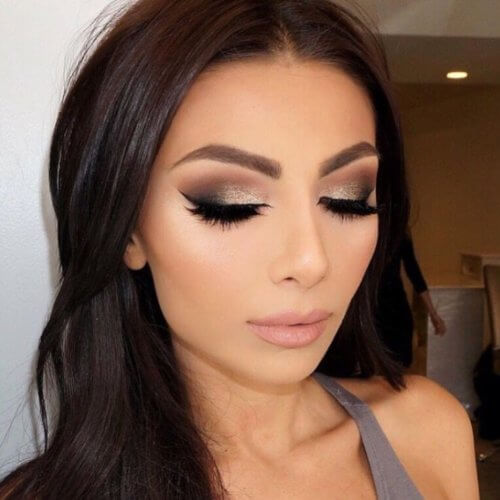
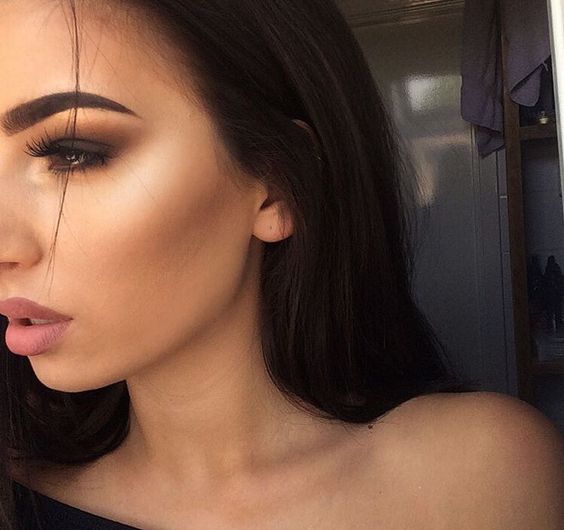
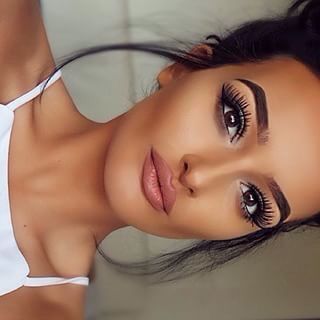
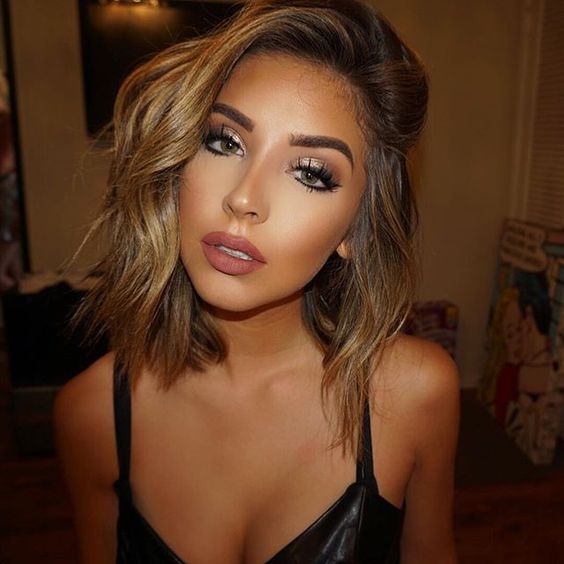
 “Highlighter & contour, eyebrows are on fleek/instagram
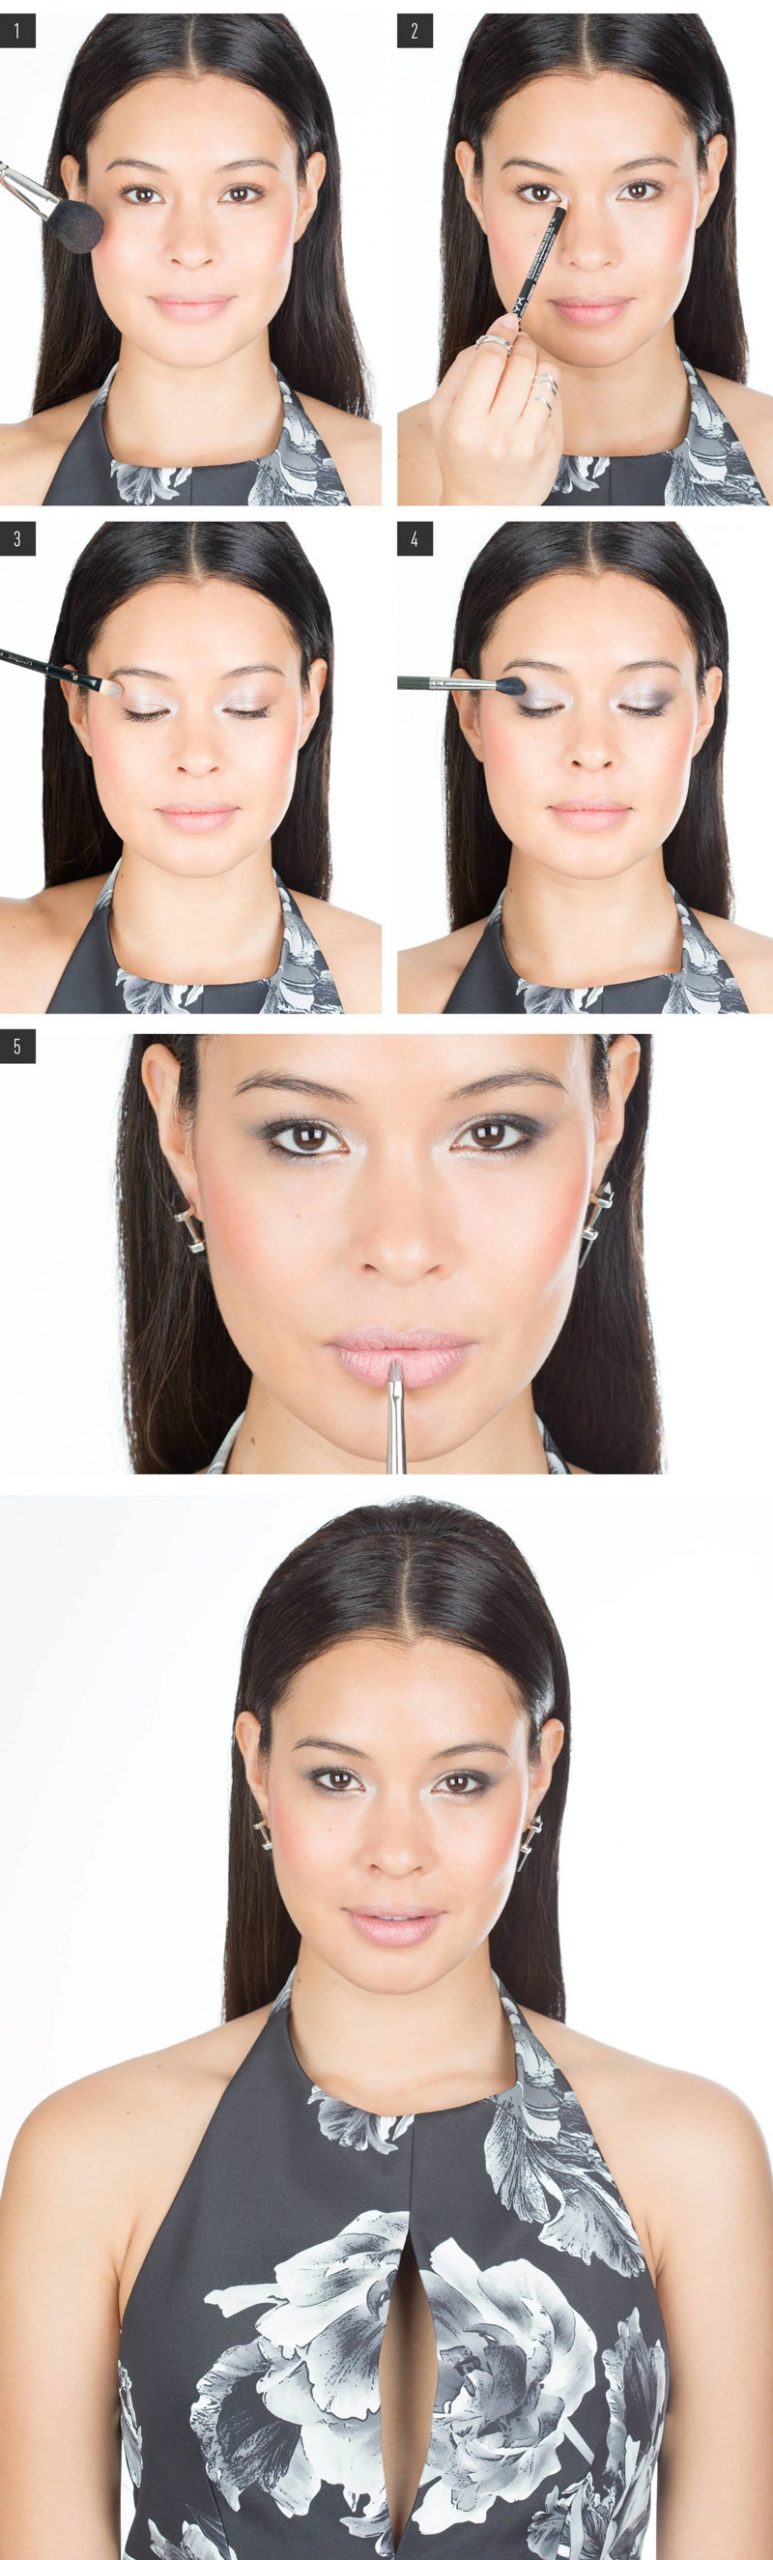
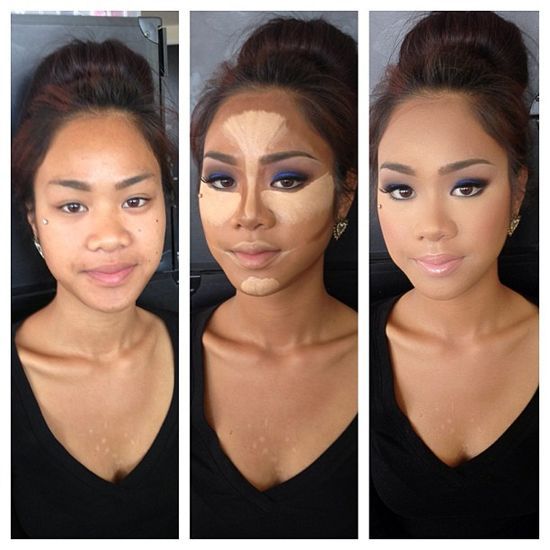
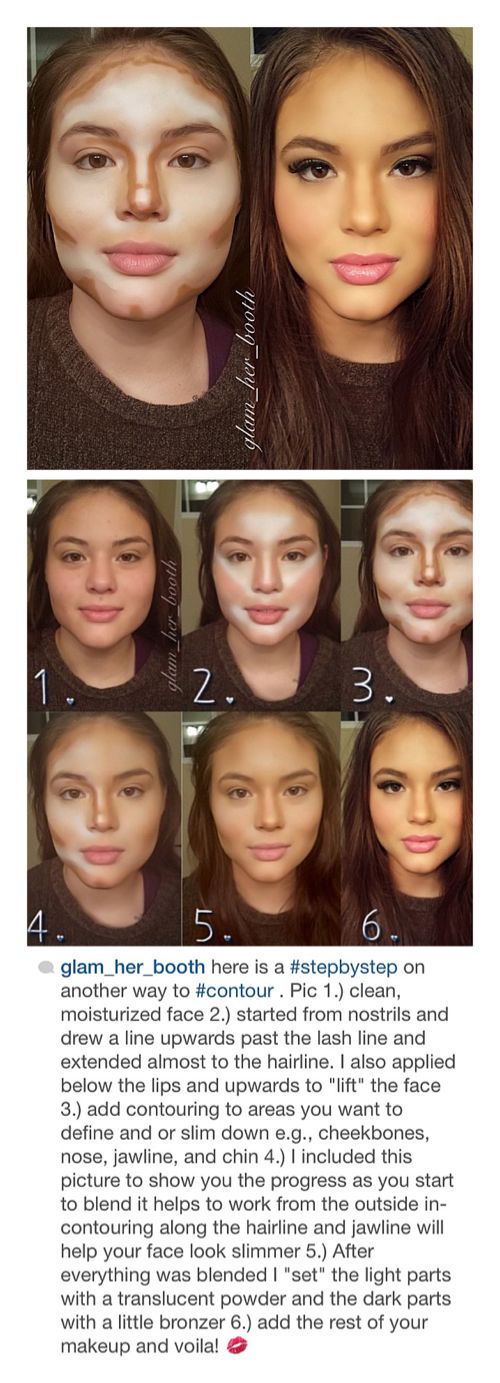 how-to-Contouring-and-Highlighting-Step-by-Step /
 makeup – highlight contour /instagram
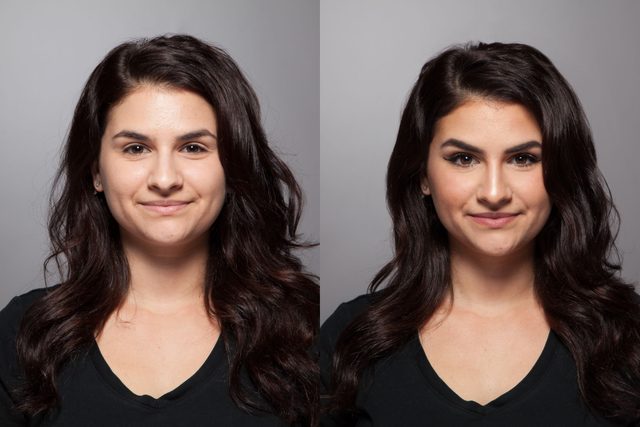
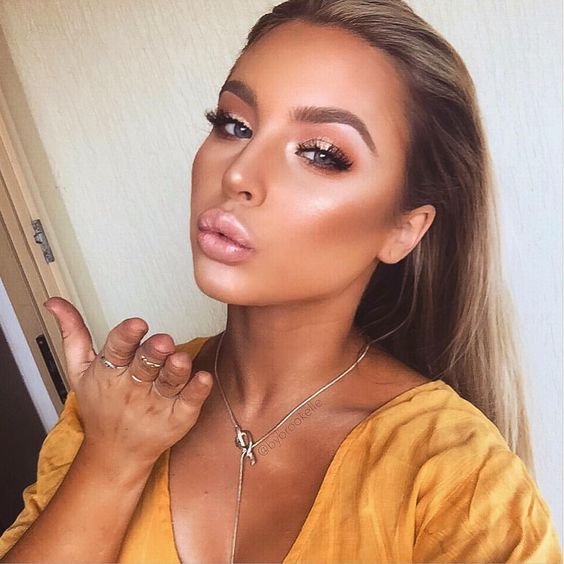
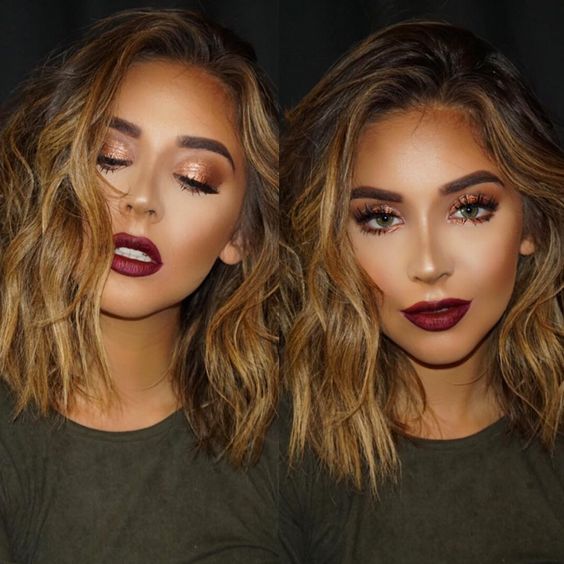 Highlighting and contouring/ Instagram